
On a typically drizzly, bleak Oregon winter day, we sat in a warm, comfortable studio and painted brightly colored, exotic orchids under the tutelage of Heeyoung Kim. She had asked us each to create a drawing before the workshop of a deep pink or purple orchid with relatively few markings or a similar blossom. We were to transfer the drawing to watercolor paper and do some color studies prior to the workshop so we would be ready to start painting right away.
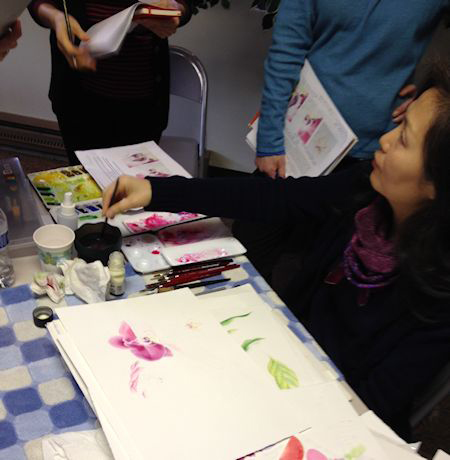
Demo by Heeyoung
During the 2-day workshop, she gave us several demonstrations covering graduated washes, lifting, dry brush technique, color mixing, laying out our palettes, good brushes and how to use them, and under painting. I can’t begin to describe and explain all that she covered in the workshop–you’ll have to sign up for one from her at the next ASBA conference so you can learn personally from her! Rather, I will give you a brief overview and point out a couple of the things that were particularly helpful to me.
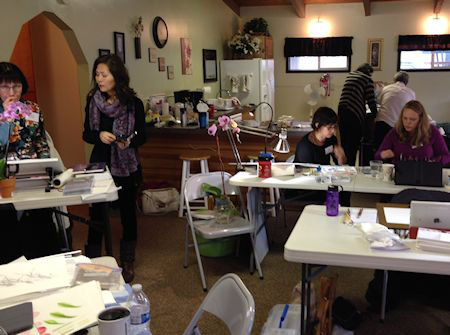
Concentrating on practicing new techniques.
On Saturday after her first demos, she walked around and gave us feedback on our drawings. I had been working on an orchid drawing before the workshop but was not satisfied with it so at the last minute decided to switch to Yuletide Camellia as my subject. This shrub grows outside my kitchen window and delights me all winter with its cheery blossoms. I have long wanted to paint it. I did the drawing after Friday’s session, where we discussed golden proportions, so just for fun I tried to see how many I could incorporate into my drawing. Again, please note that Heeyoung does not advocate using these proportions in a formulaic way, just as problem solvers when you are struggling with a composition.

Preliminary drawing on tracing paper for the workshop with some golden proportions noted.
One of Heeyoung’s demos was about how to apply masking fluid. I have had a like/hate relationship with masking fluid for quite awhile and have tried several different methods of applying it with mostly unsatisfactory results–lines too thick and clumps galore! With all of the stamens in my camellia, I was looking forward to finding a better way so I could mask them out before doing the washes of color over the petals. Heeyoung did not disappoint!
She uses a Hunt Extra Fine #512 pen nib in a holder, loads it up well with masking fluid, then very slowly draws her pen over the paper so capillary action draws the fluid smoothly off of the nib. Her method works so well that when I tried it for the stamens on my camellia drawing, I even had to go over them twice to make the lines wider (my drawing is 1.5 x life size). She uses Winsor and Newton masking fluid, but the method worked well with my Fineline fluid as well, so I suspect that success lies in the nib, and moving it slowly over the paper rather then a specific brand of masking fluid. Sometimes the fluid doesn’t start flowing right away, so its helpful to make a few lines on scrap paper until the flow starts. Once it starts, its surprising how long it keeps going. After awhile the fluid will start to dry on the nib, so wipe it off and start the process over. This method is great not only for stamens but wispy roots or grasses. I find that a brush works better for larger areas.
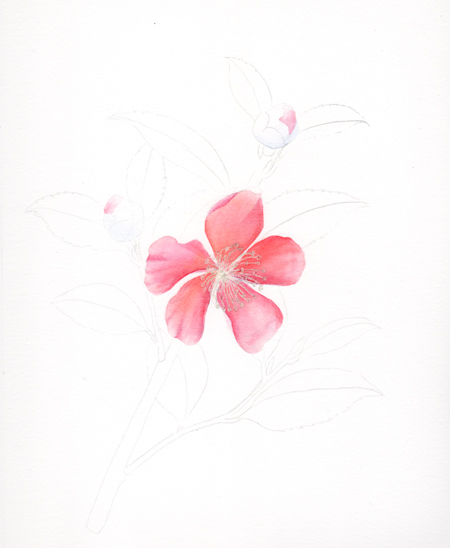
My drawing has been transferred to my watercolor paper, the stamens were masked out using a pen and nib and the first washes were applied to the petals.
Another thing she talked about is under-painting, or mapping out your painting with your initial washes. Btw, this very is different than the grisaille technique of painting a monochrome under-painting to establish values, then applying color on top. My ears perk up when a teacher takes something that I have already made part of my method and brings it a step farther. I’ve been starting with bright washes on back-lit petals or leaves and putting a blue or a blue bias wash down first on shaded areas. But Heeyoung under-paints her entire painting with a very light wash of bright, transparent colors. For instance, on the leaves she paints a thin wash of a bright yellow over the portion of the leaf facing the light, and bright blue over the portion facing away from the light or in the shade, reserving white areas for reflected light, letting each wash dry completely before applying the next one so the washes don’t mingle. She says this under painting brightens the work, and you can proceed more quickly with confidence because you can follow the map you have already laid out.
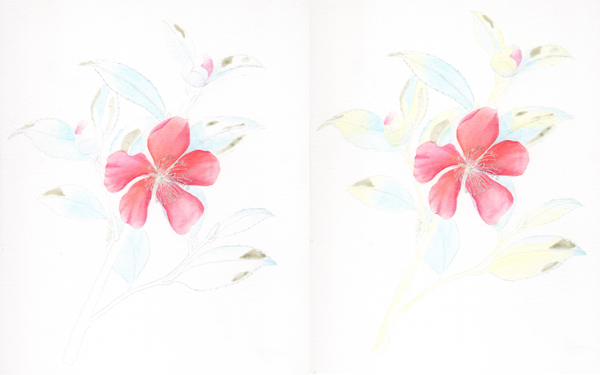
I used a brush to apply mask in larger areas and used the nib for the thin, delicate stamens. Then I applied a blue wash over the ‘cool’ areas of the leaves (left image), and then yellow over the ‘warm’ areas (right image).
Another advantage of the under painting, is that it makes lifting work much better. These initial light washes keep the subsequent washes of staining pigments from soaking into the paper as much, so they are more easily lifted.
I will show you the next stages in my painting in future posts. I want to thank Heeyoung Kim, who so generously gave me permission to share about her workshop in my blog. I’ve only scratched the surface of what she covered, but I hope you have found the information interesting and helpful. I highly recommend her workshops if you have the opportunity.
I also want to thank the fellow participants for their great company and the inspiration I received from their beautiful drawings and paintings. What a delightful bunch of people to spend the weekend with!


 This blog is about my journey as a botanical artist--what I am learning, what inspires me and what I am currently drawing or painting. My desire is to continually hone my skills to better express my wonder and gratitude for the beauty of the creation around me in the Pacific Northwest (USA).
Wonderful and so interesting!!! Thank you Janene!
Thank you, Shevaun–you are always so encouraging!
This is fascinating. I can’t wait to have a go at the underpainting you describe. I am always keen to make my work look brighter.
Christine, I hope you share the results online–I’d love to see it! So far I am pretty pleased with the effect on my Camellia, and it makes a huge difference with lifting.
Hi Janene! This is Crystal from PNBA. I came across your blog, while browsing facebook of Heeyoung Kim. Your blog is awesome, and your postings on Heeyoung’s workship are great, too! I will have to read it thoroughly later, and take time to browse your blogs. My orchid painting is just sitting in my bag. 🙁 Also, I have to say your art is beautiful. I really like the one on this page, the one that you brought to Heeyoung’s workshop for critique. It is an absolutely beautiful piece. Do you mind if I share your posts about Heeyoung Kim’s workshop with a few of PNBA members including Joan Clickston, who had to go back to Seattle due to her sickness on our workshop weekend. Your posting will be helpful for her to get the sense of what we learned from our class. I am still feeling sorry that Joan had to miss our wonderful workshop. Thanks Janene!
Thanks, Crystal! I’d be delighted if you would share my blog post all you want–thank you! I just sent a link to Joan before I read your comment because I was thinking of her too–so sorry she had to go home early and miss the workshop. I hope you have time to finish your orchid painting because you got such a beautiful start on it! Best wishes!!
So beautiful and informative Janene! I can’t wait to see the finished painting!!
Thanks Gail! I appreciate your support!!
Janene, I have so enjoyed your last two posts on the great and informative time you have had at Heeyoung’s courses.