
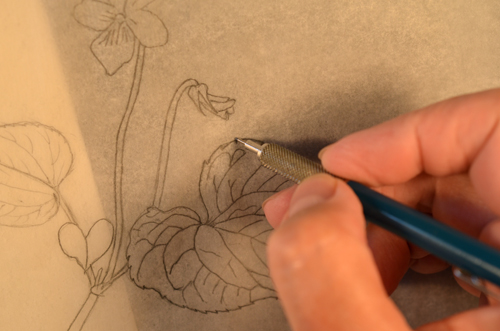
After preparing my piece of Kelmscott vellum, the next step is to transfer my completed drawing to the vellum.


When I was starting out on vellum, I learned much from other artists who shared their techniques. Here are some articles and posts that I’ve found particularly helpful:
Kate Nessler’s article from the ASBA journal, The Botanical Artist.
Denise Walser-Kolar’s article from the ASBA journal, The Botanical Artist.
Dianne Sutherland has many resources and tutorials on her website and blog regarding vellum.


 This blog is about my journey as a botanical artist--what I am learning, what inspires me and what I am currently drawing or painting. My desire is to continually hone my skills to better express my wonder and gratitude for the beauty of the creation around me in the Pacific Northwest (USA).
Brilliant blogpost, Janene! What a fantastic painting too! Is it for the SBA next year? Well done!
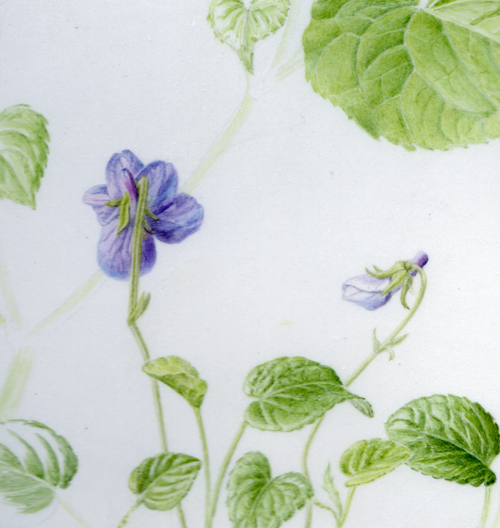
Thanks, Shevaun! I do plan to submit this painting to the SBA exhibition next year. I’d better get busy and get it done so I can work on the others I hope to send in as well.
Just want to say your website is good. Thank you
Thanks, Jo!
Oh how gorgeous Janene!
So lovely to see your processs and how the outcome has so much delicacy and sweet tenderness towards the plant life.
Hi Coral, thank you so much for visiting and commenting. I am a big fan of your work and blog, and your kind comment means a lot to me.
Thank you for sharing your knowledge. Your work is beautiful.
This is a brilliant and helpful post. I like your description of how the brush should be — it adds to how others have described the “vellum dry brush.” Every little detail helps. Your painting is beautiful, “tender,” just as Coral Guest has described. I find myself coming back over and over again to this post and am inspired by it each time. I hope to take a class with you some day!
Hi Lea, I am happy that you found the post helpful! It is my hope to give back something to the artistic community that I have received so much from myself. I agree that every bit of knowledge about the art and craft of botanical art adds to ones skill and technique. Best wishes to you!
Your work is truly amazing! I would love to try my hand at painting on tracing paper and thereafter having such painting photocopied for my portfolio. My question is two-fold:
One, any problem, such as non-clarity in the photocopying process? Two, would I need to use only specified vellum paper, or would my Artist’s Loft “TTracing Pad” (without mention of any vellum) work as well? (If not, where would I be able to purchase strictly vellum paper?)
Hi John, Thank you for your kind comment. I advise that you follow the links I have provided in this post, so you have a clearer idea of the materials I am using. The vellum I refer to is not vellum paper but the kind of calfskin parchment vellum that was used in the middle ages. It is made of processed animal hide, and is produced by hand in an ancient process by a few companies around the world. I talk about it in other blog posts. William Cowley’s in Great Britain or Pergamena in the US both produce calfskin vellum. I do not paint on tracing paper. Modern paper vellum is named after the original, ancient kind of vellum because it has a smooth surface but is entirely different to paint on. It is best for graphite or ink drawings.